
Instrumentation and Irrigation Techniques in Endodontics: Step-Back and Crown-Down
Traduzione automatica
L'articolo originale è scritto in lingua ES (link per leggerlo) .
Endodontic treatment at the stage of preparing the root canals for obturation requires addressing the following issues:
creation of a “glide path,” canal negotiation;
establishing the root canal length;
sequential mechanical instrumentation and irrigation of the canal.
Learn more about this topic in the webinar Clinical strategy for root canal treatment for effective irrigation .
Determining working length in endodontics
It is preferable to use small hand files for the initial negotiation of canals, sizes 6–15. Either a K-Reamer or a K-file will work.
Working length is the distance from the cusp tip or the highest point of the tooth to the physiologic constriction. Establishing the working length is also an important stage of endodontic treatment, since its value varies considerably.
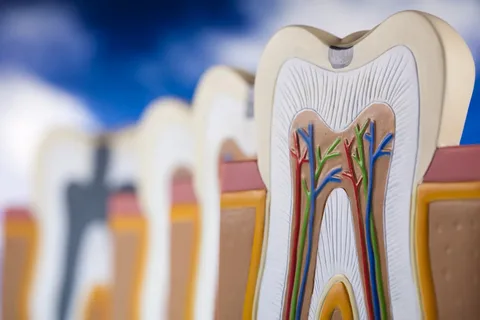
Figure 1. Dental pulp.
Methods for determining working length
physical, using an apex locator;
radiographic;
combined.
Apex location is based on the fact that tissues have a constant electrical resistance. Dental tissue has greater resistance than the mucosa or periodontal tissue; therefore, the electrical circuit formed between the electrodes placed in the canal and on the lip does not close until the file reaches the periodontal tissue.
The first generations of apex locators worked exclusively in dry, clean canals; their mechanism of action was based on determining the intensity of direct current. More modern apex locator models determine impedance using alternating currents of different frequencies. The lowest impedance is measured in the region of the apex and the highest in the region of the orifice. The apex locator identifies the area where the resistance drops. No model of this device is capable of measuring canal length, even if it is equipped with a millimeter scale.
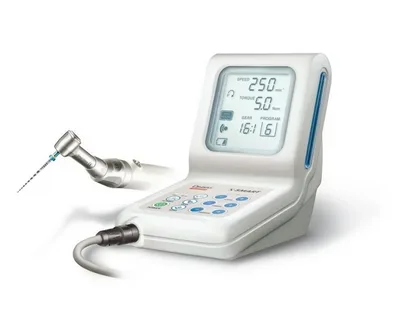
Figure 2. Apex locator.
Protocol for measuring working length
Algorithm for measuring working length:
the instrument is inserted into the canal, stopping 2 mm short of the point determined on the diagnostic radiograph;
working length is confirmed using the physical method;
a control radiograph is taken.
Working length is verified when the instrument is positioned 0.5–2 mm from the radiographic apex and the apex locator data confirm that the apical constriction area has been reached.
Irrigation in endodontics: NaOCl, EDTA, and ultrasonic activation
Root canal disinfection is performed using sodium hypochlorite and ethylenediaminetetraacetic acid (EDTA).
Sodium hypochlorite in endodontic irrigation
A 1% sodium hypochlorite solution is characterized by proteolytic properties and ensures dissolution of pulpal remnants and organic dentin components, clears the canal, and simplifies its mechanical instrumentation. It also has a bactericidal effect and is capable of oxidizing pigments that appear during hemorrhage and pulp necrosis. Because of this, sodium hypochlorite has a bleaching effect and is used effectively to correct tooth discoloration.
The most universally accepted concentration of sodium hypochlorite is 3%, and it is used by most manufacturers.
EDTA and smear layer removal
EDTA helps soften dentin to a depth of 50 microns along the canal walls by chelating calcium ions, which greatly simplifies instrumentation. The use of EDTA is effective for removing the smear layer, opening the dentinal tubules, and creating the conditions for application of the endosealer.
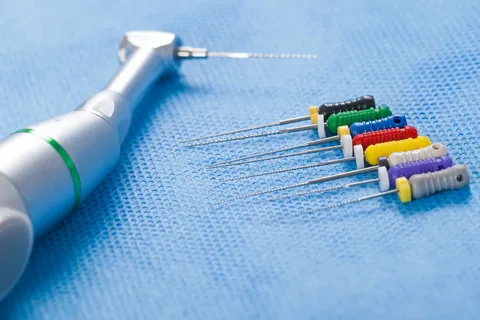
Figure 3. Endodontic instruments.
EDTA is available as gels or solutions at a concentration of 17%. The irrigation algorithm involves medicinal treatment of the canal for at least 30 to 45 minutes, which significantly exceeds the time required for instrumental canal treatment.
Ways to reduce the duration of medicinal treatment:
increase the volume of irrigant;
change the medicaments frequently;
ultrasonic activation of the solution.
Instrumentation techniques in endodontics
Basic methods of mechanical canal treatment:
Standardized technique.
Step-back.
Crown-down.
Balanced force preparation technique.
Standardized endodontic instrumentation technique
This involves enlarging the canal with K-files; the following stages can be distinguished:
Canal negotiation and measurement of working length. The root canal is negotiated to the physiologic constriction using a No. 8–15 K-file. The working length is set using a stop.
The canal is enlarged to a set length using a K-file corresponding to the size of the instrument used to negotiate the canal. The K-file is moved with rotational movements (“winding a clock”), followed by filing movements.
As the root canal is instrumented, the K-files are replaced each time the next size is used. The canal is enlarged to the required size, but to at least a No. 25.
This technique is suitable for treating straight canals with a round cross-section, but is not effective in cases of curved or complex canal configurations.
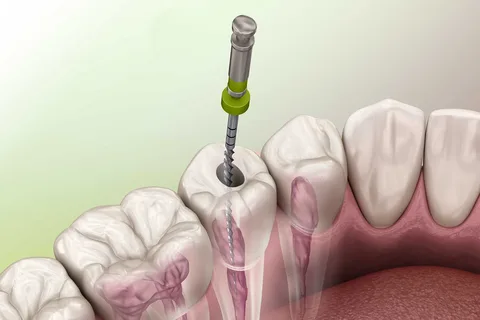
Figure 4. Mechanical canal instrumentation.
Step-Back technique in endodontics: step-by-step protocol
The apical-coronal “Step-Back” technique is based on using endodontic instruments of increasing diameter to treat the canal from the apical constriction to the orifice.
Steps of the Step-Back technique
Stages of this technique:
Measurement of working length.
A K-file of a size that fits the canal along its entire length is selected and used until the instrument begins to move freely in the canal. The same is then done with the next larger instrument, after which the previous file is used to check that the apex has not been blocked with dentin shavings. The canal is enlarged along its entire length to at least a No. 25 file (Master Apical File).
Each subsequent instrument treats the canal 1 mm shorter than the previous one, but after each file, a master file is used to remove shavings and smooth the walls along the entire canal.
Gates Glidden drills are used to treat the canal orifice.
Disadvantages of the Step-Back technique
frequent extrusion of dentin shavings beyond the apex;
formation of a dentin “plug”;
risk of root perforation;
change in the position of the apical constriction due to difficulty controlling working length during instrumentation and eliminating the curvature in the canal.
Crown-Down technique in endodontics: step-by-step protocol
From the crown down, or step forward, the “Crown-Down” technique involves sequential instrumentation of the canal, starting with a larger instrument and progressing to a smaller one. In the modern concept of endodontic treatment, this technique is considered the most preferable.
Algorithm for instrumental canal treatment using the Crown-Down technique:
Gates Glidden drills are used to treat the canal orifice.
We select a large K-file, for example, No. 35, which is optimal for instrumenting the first 15 mm of the canal. We work with this file until it moves absolutely freely in the canal. The upper third of the canal can also be instrumented with rotary instruments.
Each subsequent K-file is one size smaller than the previous one, so we continue until the instrument is 3 mm short of the expected working length. At this stage, the working length must be determined accurately.
As soon as the canal has been negotiated along its entire length, the procedure is repeated, but we start with a No. 40 file, not a No. 30, and then repeat the procedure with a No. 50 file; all manipulations are repeated until the apical third has been instrumented to size 25.
Advantages of the Crown-Down technique
minimal likelihood of pushing infected dentin debris beyond the apex;
ease of canal irrigation;
low risk of the instrument passing beyond the apical foramen;
careful control when working in the apical third due to the initial creation of convenient access.
Balanced force technique in endodontics
Preparation using the balanced force technique is another technique used in endodontic treatment; it involves mechanical canal preparation using instruments equipped with a non-cutting tip. This technique is suitable for the instrumental treatment of canals of any configuration, both straight and curved, with curvatures.
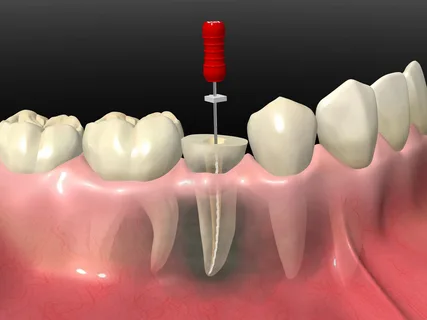
Figure 5. Endodontic treatment of the tooth.
Stages of the balanced force technique:
The file is inserted into the canal until it stops and is turned clockwise between 90 and 120°.
Applying moderate, constant finger pressure to the file so that it reaches the set depth, it is turned in the opposite direction between 270 and 360°. The manipulations should be performed using a lubricating gel to prevent the file from getting stuck.
Each subsequent instrument is one size larger than the previous one.
It is very important to control the pressure on the file so that it is not pulled out but rotates at the same depth. After each time the file is removed, it is cleaned and the canal is irrigated.
The steps are repeated until the entire length of the canal has been instrumented. The finished canal has a smooth surface and a tapered shape corresponding to the taper of the instrument.
New practice-oriented information on endodontic treatment is available in the online course New in endodontics: from anesthesia to obturation .